V první části tohoto tutoriálu jsme položili základy naší webové aplikace node.js. Dozvěděli jste se o spuštění a instalaci node, o npm a knihovně nedb a dokonce jsme napsali náš první modul. Tento týden budeme pokračovat s trasami a pohledy naší obrázkové hlasovací aplikace.
Trasy a konfigurační soubory
Minulý týden jsme vyrobili modul, který se stará o inicializaci dvou datových sad – uživatelů a fotografie . Tyto datové sady byly exportovány modulem, což nám umožňuje vyžadovat je a přistupovat k nim v našich dalších souborech js. Uděláme to v našem routes.js soubor, který obsahuje všechny cesty, na které bude aplikace reagovat.
routes.js
/**
 * This file defines the routes used in your application
 * It requires the database module that we wrote previously.
 */

var db = require('./database'),
    photos = db.photos,
    users = db.users;

module.exports = function(app){

    // Homepage
    app.get('/', function(req, res){

        // Find all photos
        photos.find({}, function(err, all_photos){

            // Find the current user
            users.find({ip: req.ip}, function(err, u){

                var voted_on = [];

                if(u.length == 1){
                    voted_on = u[0].votes;
                }

                // Find which photos the user hasn't still voted on

                var not_voted_on = all_photos.filter(function(photo){
                    return voted_on.indexOf(photo._id) == -1;
                });

                var image_to_show = null;

                if(not_voted_on.length > 0){
                    // Choose a random image from the array
                    image_to_show = not_voted_on[Math.floor(Math.random()*not_voted_on.length)];
                }

                res.render('home', { photo: image_to_show });

            });

        });

    });

    app.get('/standings', function(req, res){

        photos.find({}, function(err, all_photos){

            // Sort the photos

            all_photos.sort(function(p1, p2){
                return (p2.likes - p2.dislikes) - (p1.likes - p1.dislikes);
            });

            // Render the standings template and pass the photos
            res.render('standings', { standings: all_photos });

        });

    });

    // This is executed before the next two post requests
    app.post('*', function(req, res, next){

        // Register the user in the database by ip address

        users.insert({
            ip: req.ip,
            votes: []
        }, function(){
            // Continue with the other routes
            next();
        });

    });

    app.post('/notcute', vote);
    app.post('/cute', vote);

    function vote(req, res){

        // Which field to increment, depending on the path

        var what = {
            '/notcute': {dislikes:1},
            '/cute': {likes:1}
        };

        // Find the photo, increment the vote counter and mark that the user has voted on it.

        photos.find({ name: req.body.photo }, function(err, found){

            if(found.length == 1){

                photos.update(found[0], {$inc : what[req.path]});

                users.update({ip: req.ip}, { $addToSet: { votes: found[0]._id}}, function(){
                    res.redirect('../');
                });

            }
            else{
                res.redirect('../');
            }

        });
    }
};
Zde app je instance webové aplikace Express.js, kterou vytvoříme v našem index.js soubor. Exportujeme funkci, která bere aplikaci jako argument, což nám umožňuje později ji vložit jako závislost.
Další soubor, který zapíšeme, je konfigurační soubor, který nastavuje některá nastavení pro naši aplikaci:
config.js
/**
 * This file runs some configuration settings on your express application.
 */

// Include the handlebars templating library
var handlebars = require('express3-handlebars'),
    express = require('express');

// Require()-ing this module will return a function
// that the index.js file will use to configure the
// express application

module.exports = function(app){

    // Register and configure the handlebars templating engine
    app.engine('html', handlebars({
        defaultLayout: 'main',
        extname: ".html",
        layoutsDir: __dirname + '/views/layouts'
    }));

    // Set .html as the default template extension
    app.set('view engine', 'html');

    // Tell express where it can find the templates
    app.set('views', __dirname + '/views');

    // Make the files in the public folder available to the world
    app.use(express.static(__dirname + '/public'));

    // Parse POST request data. It will be available in the req.body object
    app.use(express.urlencoded());

};
Pro naše pohledy používáme modul šablony řídítek (s pomocí této knihovny adaptérů), protože se snadno píše a podporuje zobrazení rozložení. Rozvržení nám umožní sdílet společný design všech našich stránek, což je velká úspora času. Výše uvedený kód také používá middleware pro statické připojení k poskytování souborů v /public složku. Toto je nejlepší způsob, jak zpřístupnit všechna aktiva webu z webového prohlížeče.
Dalším souborem je index.js , který spojuje všechny tyto moduly dohromady a inicializuje pro nás novou aplikaci Express.js:
index.js
/**
 * This is the main file of the application. Run it with the
 * `node index.js` command from your terminal
 *
 * Remember to run `npm install` in the project folder, so
 * all the required libraries are downloaded and installed.
 */

var express = require('express');

// Create a new express.js web app:

var app = express();

// Configure express with the settings found in
// our config.js file

require('./config')(app);

// Add the routes that the app will react to,
// as defined in our routes.js file

require('./routes')(app);

// This file has been called directly with
// `node index.js`. Start the server!

app.listen(8080);
console.log('Your application is running on http://localhost:8080');
Skvělý! Naše aplikace se formuje! Chcete-li jej spustit, spusťte příkaz node index.js a server začne naslouchat na portu 8080 . Pokud se však pokusíte otevřít http://localhost:8080, v tomto okamžiku ve svém prohlížeči uvidíte pouze chybové zprávy pro chybějící soubory šablon. Je to proto, že jsme ještě nenapsali své názory.
Zobrazení
První pohled, který vytvoříme, je rozvržení. Tento soubor bude definovat společné HTML, které je sdíleno ostatními stránkami našeho webu. Vaše aplikace může mít více než jedno rozvržení (například pokud chcete mít samostatný design pro svou domovskou stránku a pro obrazovky správy), ale zde budeme mít pouze jedno.
views/layouts/main.html
<!DOCTYPE html>
<html>

    <head>
        <meta charset="utf-8"/>
        <title>Node.js Picture Voting Game</title>

        <meta name="viewport" content="width=device-width, initial-scale=1" />

        <link href="http://fonts.googleapis.com/css?family=Open+Sans:300,700" rel="stylesheet" />
        <link href="css/styles.css" rel="stylesheet" />

    </head>

    <body>

        <header>
            <h1><span class="green">Cute</span> or <span class="red">NOT?</span></h1>
            <h2>A Node.js Voting Game</h2>
        </header>

        {{{body}}}

        <footer>
            <a class="tz" href="https://tutorialzine.com/2014/01/nodejs-picture-voting-game-part-1/">Tutorial: Node.js Picture Voting Game</a>

    </body>
</html>
{{{body}}} tag je automaticky nahrazen kódem HTML ostatních zobrazení, která používají toto rozvržení. Zde je kód HTML specifický pro stránku indexu:
views/home.html
<nav>
    <a class="active" href="./">Game</a>
    <a href="./standings">Standings</a>
</nav>

{{#if photo}}

    <img src="photos/{{photo.name}}" width="530" height="420" alt="Cat Picture" />

    <div class="button-holder">
        <form action="./cute" method="post">
            <input type="hidden" name="photo" value="{{photo.name}}" />
            <input type="submit" value="Cute!" />
        </form>
        <form action="./notcute" method="post">
            <input type="hidden" name="photo" value="{{photo.name}}" />
            <input type="submit" value="Not Cute!" />
        </form>
    </div>

{{else}}

    <h3>No more photos to vote on! Check out the <a href="./standings">standings</a>.</h3>

{{/if}}
Šablony řídítek mohou mít konstrukce if/else, smyčky a spoustu dalších funkcí, které vám umožní psát čisté HTML. A zde je šablona pro stránku pořadí:
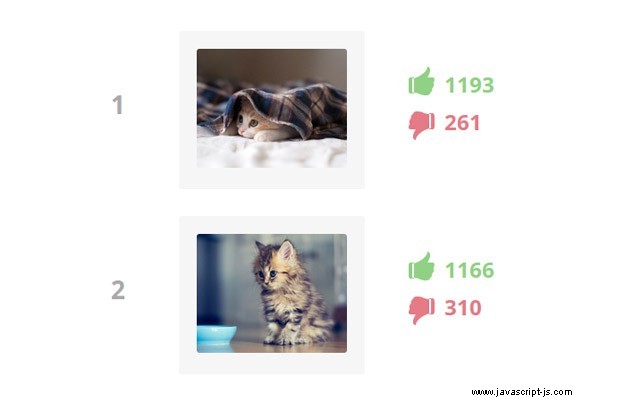
views/standings.html
<nav>
    <a href="./">Game</a>
    <a class="active" href="./standings">Standings</a>
</nav>

{{#if standings}}

    <ul>

        {{#each standings}}

        <li>
            <img src="photos/{{name}}" alt="Cat picture thumbnail" />
            <p class="up">{{this.likes}}</p>
            <p class="down">{{this.dislikes}}</p>
        </li>

        {{/each}}

    </ul>

{{/if}}
Pomocí šablon jsme schopni oddělit kód pro prezentaci dat od dat samotných. Ve své expresní webové aplikaci můžete použít mnoho různých šablon šablon.
Hotovo!
Tímto je naše obrázková hlasovací hra Node.js dokončena! Můžete jej vylepšit některým z nesčetných modulů a knihoven node.js a upravit jej libovolným způsobem. Doufám, že vám tento návod byl užitečný! Pokud máte nějaké návrhy, uveďte je do sekce komentářů níže.